
In 2011 I made the fateful decision of investing in a 27 inch iMac for my design and post-production work. I was not new to the whole OS X thing; for years I had built and run Hackintosh computers for personal use, much to the chagrin and astonishment of my more elitist peers in the design world. The sheer promise of power and fine-tuning made the whole OSX86 install process and ktext signing worth the trouble, yet the stunning 2560 x 1440 pixel IPS display of the 2011 iMac and the sleek industrial design really sold it to me.
Bear in mind that we are talking 2011 here, when WQXGA monitors weren’t exactly cheap, so compared to the $1900-ish price tag of what was a brand new 27″ iMac computer, the investment was a reasonable one. This same scenario is playing out right now with the iMac 5K; any comparable monitor is just obscenely expensive and doesn’t look nearly as good as an iMac. Here are the computer’s specifications:

Even after 4 years of use the machine remains beautiful; the display is gorgeous and, save for the replacement of a faulty hard-drive about a month ago (I leave it on 24/7,) I have had few issues almost no regrets for buying this outstanding piece of design and engineering. Yet if there is one thing Macs do not do right it is gaming, and the EVE Online Mac client is no exception. I have written in the past of my gripes with the EVE Online Mac client and I even suggested it to be discontinued entirely in favor of running a bootcamp partition of Windows on the machine.
One interesting feature of the 2011 iMac was the inclusion of the new Thunderbolt interface which replaced the mini display port found on the old 27″ iMacs. The Thunderbolt port allows the iMac to transfer up to 10gbps of data and it came to serve as the proprietary monitor input for the iMac’s target display mode, replacing the old mini display port interface. This had the drawback of not permitting the use of the WQXGA display for non-Apple computers. While some people (me included) tend to vilify Apple for eschewing mainstream interfaces in favor of cutting-edge ones, my subsequent experience of working with RAW HD video made me appreciate the speed and versatility of the Thunderbolt interface every time I had to work with hundreds of GBs of High Def video files. The fact that I was not able to use such a gorgeous display for gaming seemed like a bit of a waste. I mention this because its not rare to come across internet discussions of players attempting to connect their gaming rigs to the 27″ iMac. During the four years that I have owned my iMac I have tried every single trick in the book to get my iMac to work with my gaming rig, an Intel i7 975 machine with 24GB of RAM and an NVidia 680GTX running Windows 8.
Yesterday I read the story on how Mad Genius Built His Own Game Streaming Server For Almost Nothing on Gizmodo and the first thing it got me thinking was how bad the latency was during actual play – in the past I had tried local 1080p / 30fps streaming from my gaming PC to my iMac only to be “slightly” disappointed by the eighth of a second latency I was getting. While 1/8 of a second doesn’t sound that much, it does makes a noticeable difference to performance enthusiasts. Still, I decided to give Steam’s In-Home Streaming a try, focused on avoiding any element that could bring latency into the setup.
My first attempt was to connect each computer via a Cat-5e cable to my home router / switch and give it a try. To my surprise, the latency was extremely low, EVE was absolutely playable at 1080p and even playing videos became a somewhat watchable. The next step was to remove the router all together and connect both machines directly and utilize a shorter ethernet cable with a rating performance superior to the Cat-5e in order to minimize latency even further.
My Streaming Host Machine:
My Stream Clients:
Ok, first things first. Turn off the host machine and install the Gigabit PCI Express Network Adapter to the PCI-E 1x slot connector, which should be right next to the graphic card adapter. Reboot and install the drivers.
Once we finish the installation we will end up with one regular Cat-5 ethernet cable coming from your router to the motherboard’s integrated network adapter and a Cat-6 cable coming out from the PCI-E Network Adapter which will be connected to your iMac. Next we need to tweak the network configuration to bridge the network adapters. The process is fairly simple & once it’s finished the Host PC should be sharing the internet connection with the iMac within the same network. The reason I used two network adapters was to ensure direct communication between the Host and the client machine while at the same time allowing the host machine to connect to your home network independently. Alternatively, you can replace client machine for the optional Wireless N router I listed above if you wish to play using a laptop, as long as it supports the Wireless N protocol.
Lifehacker has a great tutorial on how to get the Steam In-Home streaming working. This guide is somewhat old, so there are several references to a beta-enrollment which have since become obsolete given the official support for In-Home streaming.
Second, we’ll tweak the graphics cards to ramp up the default 1080p screen resolution to match the native WQXGA display on the iMac or the Retina display on your MacBook, this is the main reason we are going through the trouble on ensuring the closest to a 1Gbps connection between the boxes since streaming 60 fps at such high resolution (WQXGA) requires a LOT of bandwidth. The guys at Linus Tech Tips have a video explaining how to do the upscaling. Skip to 4:20 for the gist of it:
If you own an AMD graphics card (shame on you! nah JK!) here is the related thread on how to do it.
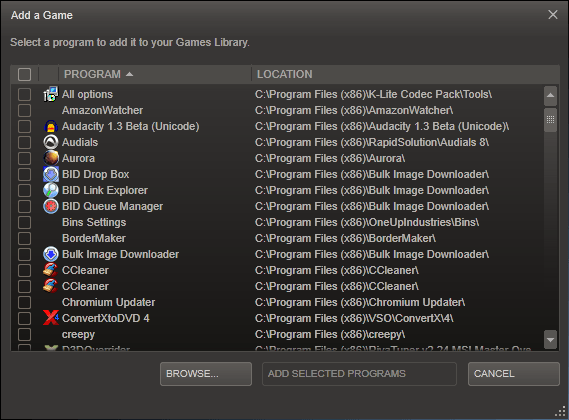
Finally, open the Steam client on both machines and log in using the same account for each. If everything is ready, the only thing left to do is to “add a game” to steam on the Host machine by clicking on the bottom left of the Steam program:

and selecting the desired game from the list:
At this point you should be wondering if you should add the EVE Launcher or the exefile.exe inside the /bin/ folder of the EVE Install. You would be surprise to know that neither of these two files is the best option: you will be better off scrolling down and selecting a trivial application like wordpad.exe or notepad.exe and then minimizing / alt tabbing to gain access to the whole desktop.
Once you are there, boom! You are good to go! log into EVE and enjoy the gorgeous upscaled graphics. In my current setup I am receiving the WQXGA feed at 59.7-9 frames per second. Needless to say it’s an incredibly satisfying experience to be able to play EVE on your iMac or Mac Book Pro at such high settings and such demanding resolution flawlessly. Windows 8 has never looked so crisp!
I do know that many of you will mention the fact that 4K monitor prices have fallen bellow the $500 mark, yet its not until you own a Mac that you begin to understand the big of a deal that this is. The guide also works for Windows and Linux system. The utility of this setup goes beyond gaming, in my case having 4 monitors (two on the mac and two on the PC) or simply switching cables can be a bit of a hassle. On the other hand, playing EVE via laptop in the living room or away from the regular environment of your home machine can be a really refreshing experience (I can envision EVE players FCing from the John). More so, I am building a similar rig to work on my professional post-production efforts, 3D and other intensive processing tasks without losing my primary OS X design environment or adding more monitors to my already-cluttered workspace.
I really hope you have found this guide useful and feel free to make any questions or comments regarding the setup and I’ll be happy to give you a hand.
Tips:
– Since the iMac will rely on the host machine for ethernet internet access, it makes sense to also setup the iMac’s WIFI connection so it falls back to it whenever you turn off the host machine. Make sure to drag and drop the service order so it picks up the ethernet should both services be available at the same time.
– There is a weird bug with on OS X where the Steam client loses its icon and gives “Streaming error” upon opening. All you need to do to fix this is to move (control + drag) the Steam app out of the /applications folder and then click/drag it back into the apps folder. This happened just once to me.
– I haven’t tried multi-monitoring yet. Will try this weekend.